Showing posts with label DIY. Show all posts

Tuesday, January 20, 2015

DIY Book Page Wreath


I posted this photo on @thetealegg on Instagram right about the first of the new year.  And I got several comments on the book page wreath on the far wall.  There are HUNDREDS of book wreath tutorials out there.  I mean HUNDREDS!!!  I think that I made my first one 3 or 4 years ago.  But, here is what I know.....they are TIMELESS.  They are always beautiful.  And I NEVER get tired of them.

They are pretty cheap to make and don't take long at all.  In fact, I made and took all of these tutorial photos while watching an episode of FixerUpper on HGTV.  Do ya'll know about FIXERUpper?!?!!!!!  If you don't just trust me and GO watch it whatever way you can get it.  It will make you want to move to a TEXAS and live on a ranch in a big old farm house!

Anyhow...as promised....

BOOK PAGE WREATH
1 Straw Wreath (mine was 10")
1 package of silver straight pins
1 old book (bought mine at Goodwill for $2)


 1.  Rip all of the pages out of the book 


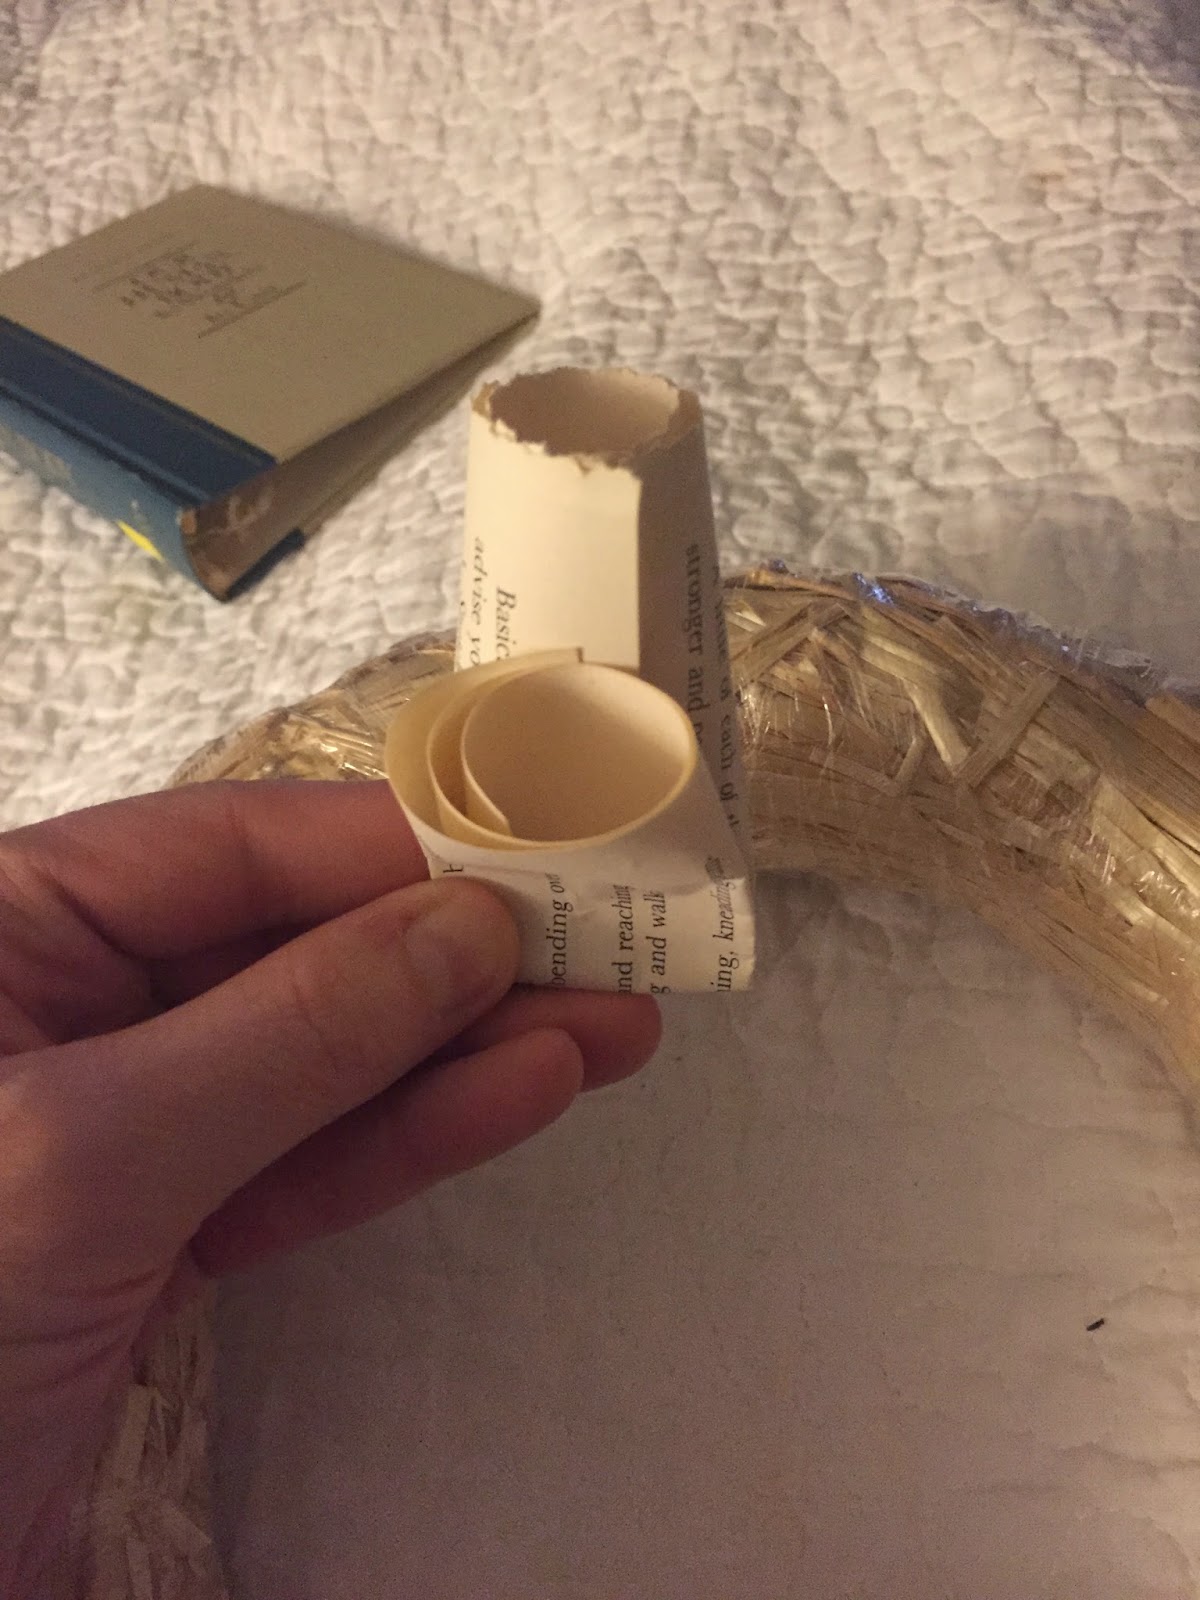
2.  Roll a page up from bottom to top (not side to side, unless you are going for another look)


3.  Fold the rolled paper almost in half (but not quite)


4.  Push a straight pin through the folded paper and into the straw wreath 


5.  I start at the inside of the wreath and push paper in all the way around around 


6.  Then I start a second row and continue the pattern all the way around 


7.  I start a third row and really try and fill in any gaps along the way.  And if you need a fourth row...by all means do it and fill that bad boy in. 


The fuller the wreath the better it will look completed!
ENJOY and tag @thetealegg on Instagram if you make one of these and post.
I would love to see how your's turned out.


And in case you would like to see this in video form...
Click Here.

Thursday, July 3, 2014

DIY: Silhouettes Made Easy

For the longest time I have been wanting to make silhouettes of my children.  My sister came last week and we got our craft on.  One of my friends says that silhouettes are a great way to freeze time.  I love that thought.  These silhouettes found the perfect place in our home and they are my newest treasure.

I searched MANY ways to make a silhouette.  Some suggestions included: publisher, ipiccy, 
pic monkey....  I downloaded ipiccy for free and honestly just got frustrated with my inability to really follow the curvature of their faces.

So here is how we did it.  It was not rocket science at all.  And, I am sure that somewhere in my search engine I could have found 100 people who would have suggested it this way. (I probably really should be on Pinterest).

Sorry the pictures are a little grainy....that's what happens when you snap with your phone!


Here is what you will need:
Camera
White Background 
(we used a white blanket draped over an air mattress standing on it's side)
Sunlight
Exacto Knife
Computer
Printer
Black card stock (we used black construction paper)
Mounting paper (I used brown and my sister used blue)
Double sided tape or regular ole scotch tape


Position your child in profile position with a white background behind them.
We tried a dark background but found that the white background worked best for detail.


Open the blinds of your windows to let the natural sunlight kiss their face.
Snap some photos


You might want to have someone stand right in front of them 
to keep their attention from looking over at you 


Load your photos on your computer (We used iPhoto)
Pick your favorite photo
Print at 8x10 (we printed in color for precision and detail)


Take your exacto-knife and cut out your child's profile.  You may want to practice cutting something else out if you are not familiar with your exacto-knife.


Tape your child's printed profile to a sheet of black card stock or black construction paper

Use your exact-knife to trace and cut around your child's profile.


Detach printed photo from black card stock 
(this will leave you with a black card stock profile as well as a color printed profile). 


Place a few pieces of tape or double sided tape to the back of the black card stock profile and adhere it to the center of your mounting paper (our mounting paper was 8.5"x11")


Then frame as you like!

Such a FUN, EASY, and QUICK project and a promise full JOY for many years to come!  These would be great mother's day, grandparent's day, father's day gifts.  Or just a special treat for you.  How fun would it be to surprise your friend with silhouettes of her children!?


I don't know about you but on the eve of America's birthday, I sure am thankful for the men and women who have given their lives for my freedom and for the opportunity to raise these sweet little children in the Land of the Free and the Home of the Brave.

**I hope you have a WONDERFUL 4th of JULY**


Friday, May 23, 2014

Mermaid Canvas Using Handprints

I think I promised this post weeks ago.

But this happened....


And I still have not recovered!!

So here is what you need to make a Mermaid Canvas with your child's handprints.  We did this fun project at my daughter's fourth birthday party just a few weeks ago and it was tons of fun.  I owe all the creativity to my friend Nan who provided me with this great idea.

What you will need...


One canvas (I chose 8x10 for size)
Several colors of acrylic paint {hair color, skin color, fin color, polka dot color}
Cheap sponge brushes {I think I got mine at Michael's 14 for $1.00}
Thin to medium paint brush {I just pulled from my stash}

1.  Paint your child's right hand with the color of hair that you desire and have them press their hand down firmly on the canvas {make sure to coat their hand in paint}


2. If you have a child with highlights or low lights add those in by just repainting their fingers and pressing hand firmly back in the same place.


3.  We used baby wipes in between paint colors to take the paint off in a jiffy and keep kids from running back and forth to the sink

4.  With a thin/medium sized brush paint a circle for the face as well as the neck and arms.  Make sure to not get these lines too thick.


5.  Select the main fin color and paint your child's hand that color.  Have them press their hand firmly (with fingers together) down the center of the canvas. (You are making her body at this point).


6.  Paint hand again.  Have child spread fingers and press hand firmly to each side of the canvas (you are making her fins at this point)


7.  Last step.  Let your child choose their favorite accent color and with their finger dabb polka dots all over the mermaids body and fins.


8.  Allow time to dry

Really this is a simple project.  If you are doing it at a party I recommend one person showing how to do it step by step with all other children following along each step.  If you have four year olds or younger it is best when a parent is there to help.


If your princess is dreaming of a Mermaid Party this may be just the project that sets the fun tone for your entire party!

So forgive me for the post delay.....Sometimes time just gets away from me
and we never know who might flip her fins right to our table!


*And with all this mermaid talk, I have added three new items to my ETSY store just in time for summer.  They are all ready to ship out with purchase!  I hope to add a few more things over the weekend.  You can click the link on the right hand side of the blog to see a few new summer treats.*