Showing posts with label Decorating. Show all posts

Tuesday, January 20, 2015

DIY Book Page Wreath


I posted this photo on @thetealegg on Instagram right about the first of the new year.  And I got several comments on the book page wreath on the far wall.  There are HUNDREDS of book wreath tutorials out there.  I mean HUNDREDS!!!  I think that I made my first one 3 or 4 years ago.  But, here is what I know.....they are TIMELESS.  They are always beautiful.  And I NEVER get tired of them.

They are pretty cheap to make and don't take long at all.  In fact, I made and took all of these tutorial photos while watching an episode of FixerUpper on HGTV.  Do ya'll know about FIXERUpper?!?!!!!!  If you don't just trust me and GO watch it whatever way you can get it.  It will make you want to move to a TEXAS and live on a ranch in a big old farm house!

Anyhow...as promised....

BOOK PAGE WREATH
1 Straw Wreath (mine was 10")
1 package of silver straight pins
1 old book (bought mine at Goodwill for $2)


 1.  Rip all of the pages out of the book 


2.  Roll a page up from bottom to top (not side to side, unless you are going for another look)


3.  Fold the rolled paper almost in half (but not quite)
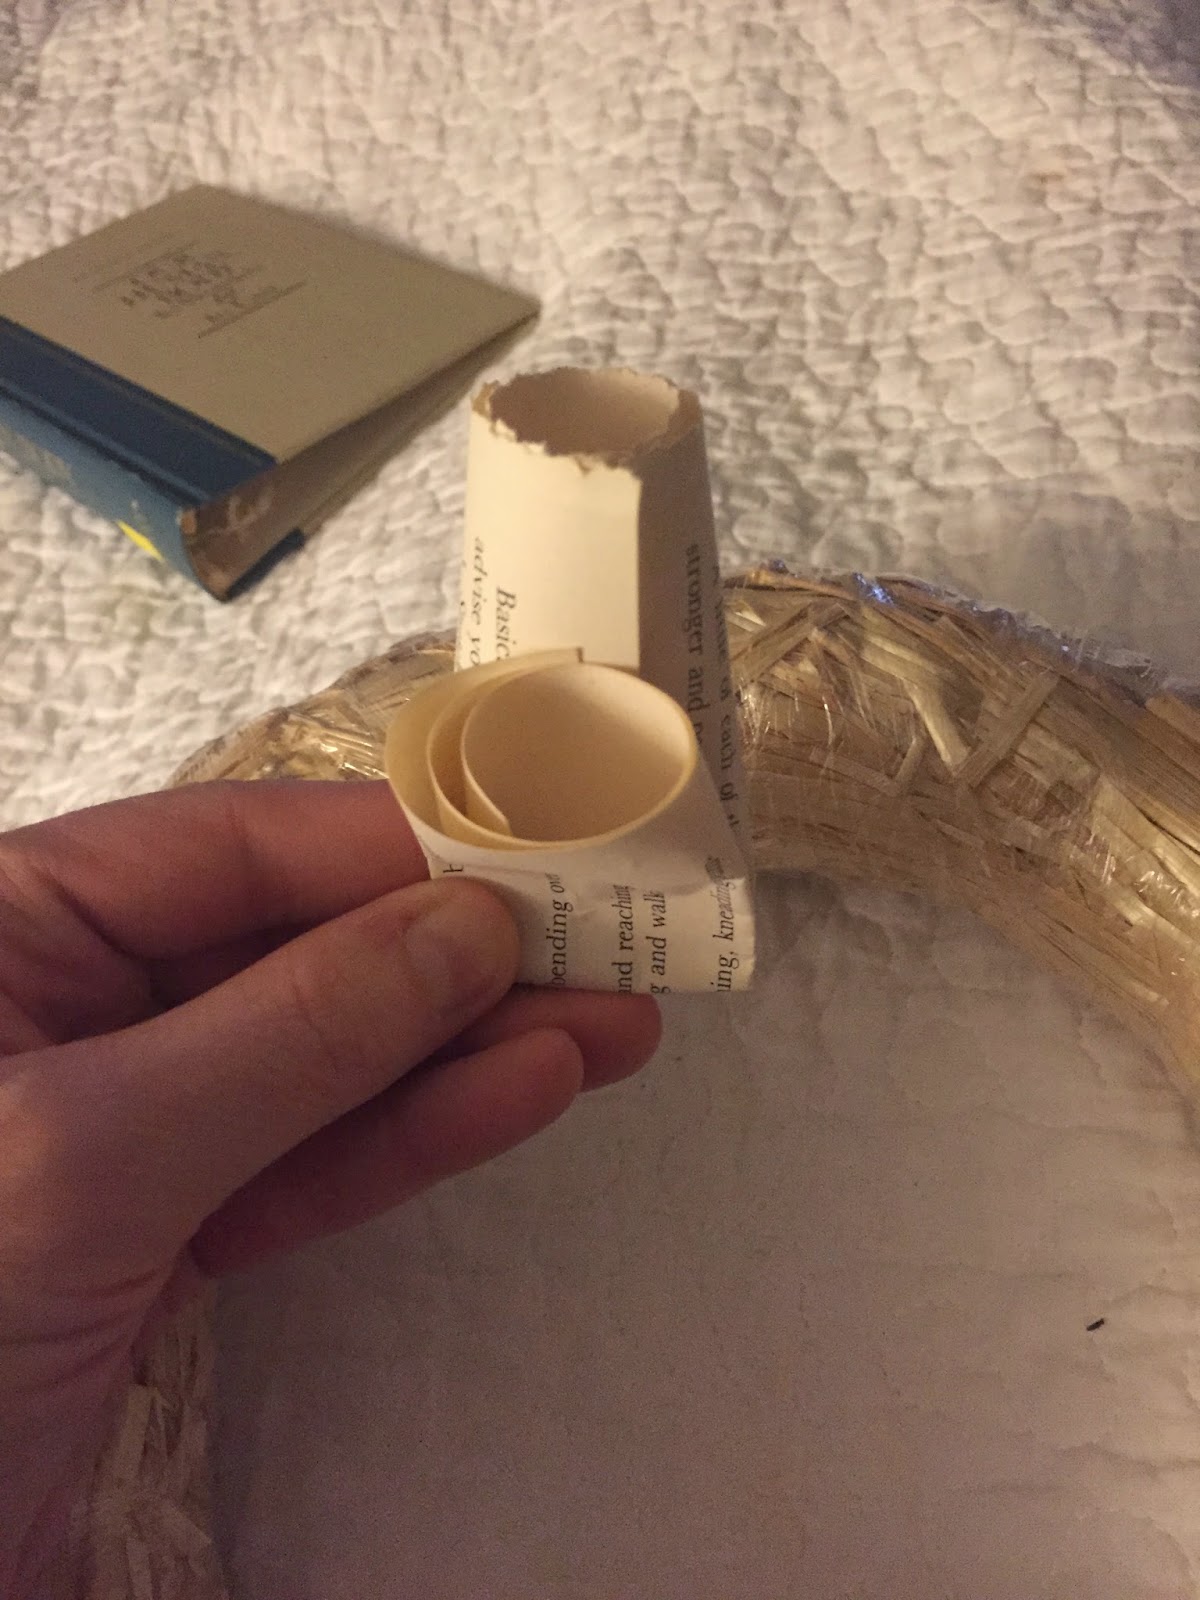

4.  Push a straight pin through the folded paper and into the straw wreath 


5.  I start at the inside of the wreath and push paper in all the way around around 


6.  Then I start a second row and continue the pattern all the way around 


7.  I start a third row and really try and fill in any gaps along the way.  And if you need a fourth row...by all means do it and fill that bad boy in. 


The fuller the wreath the better it will look completed!
ENJOY and tag @thetealegg on Instagram if you make one of these and post.
I would love to see how your's turned out.


And in case you would like to see this in video form...
Click Here.

Thursday, December 5, 2013

Christmas Mantel: Lighten Up a Dark Mantel


We moved this last year which always makes for awkwardness 
in decorating for holidays.  
Things that had special places in our old home sometimes look out of place in our new home.

Our old mantel was white and very straight lines.
Our new mantel is dark with stacked stone creating a very masculine look.
I often find lightening up this mantel a challenge....


Here is my best shot at our Christmas Mantel in a new house


 Step 1: Keep our old white stockings


 Step 2: Turn the spotlight on the mantel to incorporate some light

{kinda feels like a heavenly glow}


 Step 3: Add some light garland.

I chose this shimmer gold and silver circle garland from my shop
Each are 8 ft long and fit perfectly along the mantel


Step 4: Add a little shimmer to your stockings.

I added these 4" Gold shimmer letters
and tied them on with some cream and gold bakers twine.


 {that moment you realize you only have 4 stockings and there are now 5 in your family}
I can not find these stockings at Pottery Barn any longer.  
If you have any leads on where I could find one, please let me know!
Bad momma!


Step 5: Add your favorite "toppings" to the mantel.

These green and silver magnolias I purchased at Michaels several years ago.
The pine cones came from Hobby Lobby.  I debated spraying them cream and dusting 
their tips with gold glitter but decided against.


Step 6: Add one of your favorite Christmas pieces

I added this framed print from Luke 2.
A special treasure my mom gave me a few years ago.


 And because our first babies were a Vizsla and a Weimeraner.....
They have stockings too.
Theirs hang the opposite direction from ours
but add a sweet pop of red


 There is no way to get around the TV above our fireplace......


Step 7: Turn off the TV

&

Enjoy time with your beautiful family.

***********************************************************************************

Go over and check out more Christmas Mantel ideas with


Wednesday, November 27, 2013

The Weekend Project: Do It Yourself Burlap Garland

I have fallen behind in my "The Weekend Projects".  There have been a few projects I have been working on but not really anything blog worthy.  But in an effort to stay on track....here is a project I worked on last week.

Thought it might be some inspiration for those of you who will be decorating for Christmas after Thanksgiving meal or in efforts to avoid Black Friday.  Or who knows, maybe you are like me and already have a tree up.  


{Easy Burlap Garland}


You will need:

A yard or two of burlap (really depends on what you are adorning)
Scissors
Fishing Line (yes you read that right)
Threading Needle


Lay burlap out flat (don't worry about the creases)


Cut burlap in strips.  Mine are roughly 4 inches wide. 
 I did not measure them out.  They are very rustic. 
 I just eyeballed them and went with it.


Thread fishing line through needle and tie several knots to secure line to needle


Then fold your strip of burlap in accordion style and thread your needle through the center.


Once you have threaded all of the burlap you need, cut the fishing line to your desired length.


Tie a loop at each end of fishing line (these will make the garland easy to hang)


I like using fishing line because it has some give to it.  It is clear.  And you can space the burlap out along the line to get the precise look you are wanting.


Secure loops to your tree branches and spread the burlap out


And yes....if you read my blog last year at Christmas time you will note this is the tree that had a section of lights out.  Never did get that fixed and another section went out this year. But the tree is still good....so I just grabbed a few strands and ran them through.  This $70 Target special has been going strong for 8 years now....not gonna let a little light problem get in the way.=)

And, I repurposed the Burlap Christmas Tree Skirt from last year and made garland this year!

So there is my start on Christmas before Thanksgiving!!!!
I can't believe it happened.
Thanksgiving is MY MOST FAVORITE holiday ever
and in someways I feel like I have cheated it.


I linked this project up over at Hi Sugar Plum